]]>
Stock Check Routine
A stock check should be carried out on a regular basis to confirm that the amount of stock the Elite system thinks you have is the actual amount you have in stock. We would recommend that the stock check is carried out at the end of each month, prior to completing the Period End Routine.
Stage 1 – Starting The Stock Check
From the Main Menu: Select Stock Routines, Stock Check / Period End Routines then Stock Check The ‘Main Stock Room’ You will now see the menu as below.

– Stock Check Menu –
The first option you need to enter is Start Stock Check Routine
You will then receive a warning message as below.

– ‘Stock Check Cancel’ Prompt –
Please Note: You can only have one stock check open at any time. If you or another member of your staff have previously started a stock check, if you select Yes this will cancel their stock check details.
When you are sure that you wish to continue, select Yes
You will then receive the following message.

– ‘Partial Stock Take’ Prompt –
For a full stock check, select No.
You will now be returned to the Stock Check Menu.
Stage 2 – Printing The Stock Check Sheets
From the Stock Check Menu: Select Print Check Sheets then select Print Report.
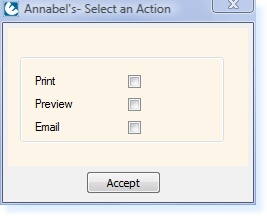
You will then be given the following options

– Print Options –
The items on the stock check sheets will be in order by group followed by PLU Number.
Please Note: The Stock Check Sheets do not include the amount that the Elite system believes to be in stock, the stock check will be a blind count.
You can now count your stock and enter it onto the stock check sheets.
Stage 3 – Entering Stock Check Figures
When all of your stock has been counted, return to the Stock Check Menu: Select Enter Stock Check Figures.
The stock check figures window will appear as below.

– Stock Check Figure Entry –
The items will appear in the same order as they printed on the check sheets.
For each item, the amount you counted must now be entered into the Count field. If you do not have any of a particular item in stock, you must select F4 Zero to record a 0 value.
When you have entered the amount for the item, select F10 Next.
Enter the stock check figures for all items. Once you reach the end of entering the stock check figures, there may be an option called ‘No Stock Control’. This should be balanced using F4 Zero.
What is the ‘F11 UCount’ option for?
Stage 4 – Print Re-Check Sheets
Once you have entered all of your stock check figures, from the Stock Check Menu, select Print Re-Check Sheets
The following message will appear…

– ‘Recheck Sheet’ Prompt –
Select Yes to Print the Re-Check Sheets.
Stock Check Sheets will now print for items which have a discrepancy. These items should now be double-checked to ensure the correct figures have been counted and entered.
Stage 5 – Enter Stock Check Figures
From the Stock Check Menu: Select Enter Stock Check Figures again.
The items shown on your re-check sheets will now be shown in the Enter Stock Check Figures screen.
Stage 6 – Print Stock Discrepancy Report
From the Stock Check Menu, select Print Stock Discrepancy Report.
This report will then print to your Report Printer. This report will show the discrepancy amount between the amount the Elite system recorded was in stock and the amount you have counted in stock.
Stage 7 – Complete Stock Check Routine
From the Stock Check Menu: Select Complete Stock Check Routine.
The following message will appear.

– ‘Close Stock Check’ Prompt –
Select Yes, a screen will now appear showing a summary of the stock check figures. Select F3 Accept.
The Stock Check is now complete.


