]]>
Maintain E-Mails
When using the ‘Elite’ system in conjunction with e-mail server, you are able to create mail merged e-mails to the records existing within your database.
Sending an e-mail to a group of people chosen from the database follows a three step process:
1. Create the e-mail you wish to send.
2. Specifying any attachments – i.e. A monthly newsletter.
3. ‘Choose & Send’ to a selection from your database.
Within the ‘Utilities’ menu select the ‘Maintain Documents’ instruction.
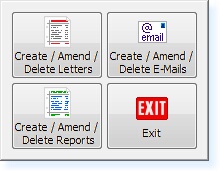
Using the ‘Create / Amend / Delete E-Mails’ function open the ‘E-Mail Management Window’. The window will initially be blank, use the ‘F3-Load’ function key to open a new e-mail.
Upon clicking or pressing ‘F3-Load’ the following window will appear:
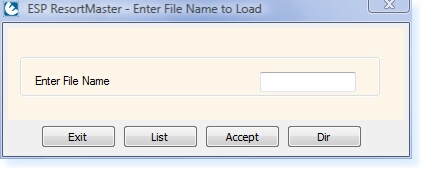
If you know the name of the e-mail you intend to ‘Create / Amend’ either enter the name and choose ‘F4-Accept’ or alternatively, select the ‘F3-List’ button, which is recommended – this draws a list of all e-mails, as shown below.
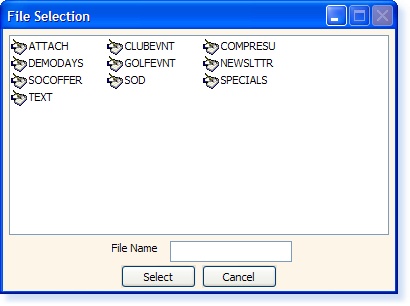
The documents listed in the window are all e-mail files. The ‘SOD.eml’ and ‘SOW.eml’ both manage the ability for the system to directly e-mail ‘pdf’ reports to your inbox each day / week, and therefore should not be altered in any way.
The ‘TEXT.eml’ and ‘ATTACH.eml’ are both examples of the type of e-mail which you are able to send to your customer database.
‘TEXT.eml’ is used to create and send basic emails, which allow for text only, and does not therefore support HTML, which in essence means that graphics are not supported. The main advantage of this approach is that the e-mail is more likely to reach the intended recipients inbox and not be deleted as spam prior.
‘ATTACH.eml’ provides the ability to ‘Attach’ a variety of documents, including ‘.doc’ (Microsoft Word), ‘.exl’ (Microsoft Excel) and ‘.pdf’ (Adobe PDF – Portable Document Format) to the e-mail, this way, the e-mail is much more likely to be received, and does not take an age to download, once received, but does provide the opportunity to include more creative, and feature rich content, such as a monthly newsletter, for example.
Initially we will look at creating a simple text only e-mail. Click select the ‘TEXT’ email and select ‘OK’.
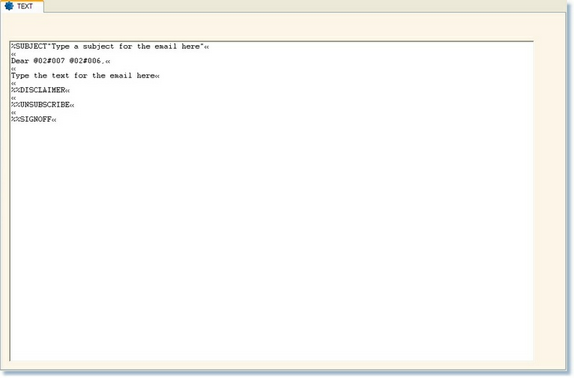
Understanding The E-Mail Editor
%SUBJECT”Type a subject for the email here”«
The ‘%SUBJECT’ part of this line indicates that the text afterwards is intended to be the ‘Subject’ of the e-mail.
Dear @02#007 @02#006,«
As this line appears directly adjacent to the margin, without any symbols, it will ‘Print’ into the message of the e-mail.
The ‘@02#007’ and ‘@02#006’ are field Identifiers, which reference particular fields within the Elite database, and merge the contents of that particular field in a similar way to a Microsoft Office Mail merge function, enabling the ability to personalise multiply e-mails in one single action.
%%DISCLAIMER, %%UNSUBSCRIBE, %%SIGNOFF
The ‘%%DISCLAIMER’ etc, are commonly known as Macros, these are commonly used tasks, which are referenced by a single command. For example by including the text ‘%%SIGNOFF’ at the base of the e-mail, the commonly used text of the sign-off for the club or individual will be automatically inserted into the base of the e-mail, upon sending the particular e-mail, without the need to retype this information each and every time it is required.
The Disclaimer, Unsubscribe text, and Sign-Off lines will be configured at the installation stage, however, these can be amended by contacting ESP.
Once you have successfully edited the e-mail, you will need to save it:
Click ‘F6-Save’ > Over type the name ‘TEXT’ with a recognisable name for your e-mail. This will ensure that you always have a master copy for you to refer to and create further e-mails from, using the original ‘TEXT’ as a template. It is also advisable to save new e-mails as ‘lower case’ names, to make them easily distinguishable from the ‘MASTER’ e-mail templates, which already exist as ‘UPPERCASE’ files.
Once a name has been chosen, click ‘F4-Accept’ > ‘F2-Exit’ > to return to the ‘E-Mail Selection Window’.
Specifying An Attachment For An E-Mail
The only difference between a standard ‘TEXT’ email and an email with attachments, ‘ATTACH’ is the ability to attach documents as mentioned above. Below shows a diagram of the ‘ATTACH’ email open in the E-Mail Editor:
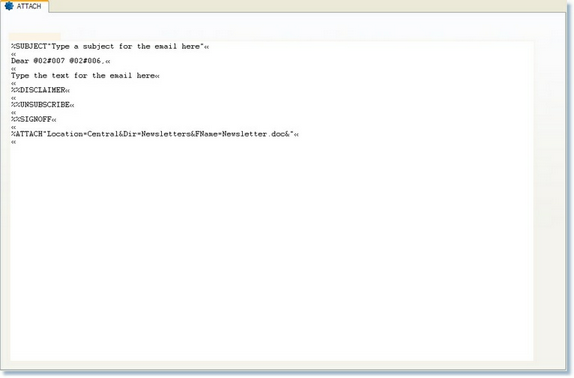
The final line of the email shown above has a ‘Destination Path’ for the email to look for the document required for attachment, when the email is sent.
%ATTACH”Location=Central&Dir=Newsletters&FName=Newsletter.doc&”«
The location of the email is the ‘Central Store’ – found via the ‘Main Menu’
The ‘Directory’ within the ‘Central Store’ is called ‘Newsletters’.
& the ‘FileName’ of the item to be attached is ‘Newsletter.doc’ – a Microsoft Word document.
The location, directory and filename in the ATTACH email or subsequent emails created from the ATTACH template can be edited, for example if a newsletter was sent every month it may be useful to name the file ‘Newsletter0705’ indicating that this was the newsletter sent in July 2005. The line in the email would then read:
%ATTACH”Location=Central&Dir=Newsletters&FName=Newsletter0705.doc&”«


